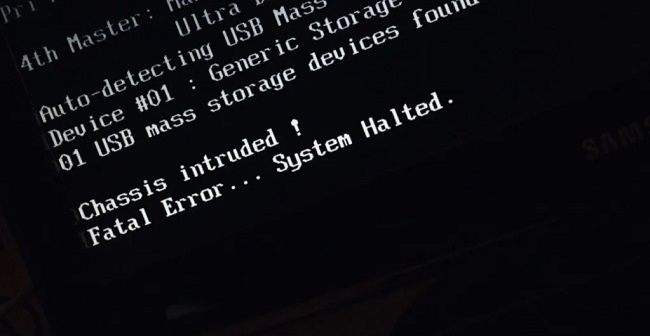
Encountering the “Chassis Intruded, System Has Halted” error message can be alarming for any Windows 10 or Windows 11 user. This BIOS-level warning is designed to alert users when unauthorized access to the computer’s internal components has been detected.
Understanding what triggers this error and knowing how to address it are essential steps in ensuring your system’s security and functionality.
This comprehensive guide will explore the causes of the “Chassis Intruded, System Has Halted” error and provide effective methods to resolve it on Windows 10/11.
What Does “Chassis Intruded, System Has Halted” Mean?
This error message indicates that the computer’s chassis intrusion detection feature, available in some BIOS/UEFI configurations, has been triggered.
This feature monitors the computer case’s integrity and is designed to halt the system if it detects that the case has been opened or tampered with, potentially exposing sensitive components.
Causes of the “Chassis Intruded, System Has Halted” Error
- Physical Case Intrusion: The most straightforward cause is the actual opening of the computer case, whether for maintenance, upgrades, or unauthorized access.
- Faulty or Improperly Connected Chassis Intrusion Sensor: A malfunctioning or poorly connected sensor can falsely trigger the alarm.
- BIOS/UEFI Configuration Issues: Incorrect settings related to chassis intrusion detection in the BIOS/UEFI can cause this error.
- Motherboard Issues: Damage to the motherboard or issues with its circuits can falsely trigger chassis intrusion detection.
Methods to Fix “Chassis Intruded, System Has Halted” Error on Windows 10/11
Check Physical Security
First, ensure that the computer case is securely closed. If you’ve recently opened your PC for maintenance or upgrades, double-check that everything is properly reassembled and that no screws or components are interfering with the chassis intrusion mechanism.
Inspect the Chassis Intrusion Sensor
- Locate the Sensor: Refer to your motherboard’s manual to find the chassis intrusion sensor. It’s usually a small switch or jumper.
- Ensure Proper Connection: Make sure the sensor is correctly connected and that there are no loose wires. If the sensor is damaged, consider replacing it or consulting with a professional.
Reset BIOS/UEFI Settings
- Access BIOS/UEFI: Restart your computer and enter the BIOS/UEFI setup by pressing the designated key (often F2, Del, or F10) during boot-up.
- Disable Chassis Intrusion Detection: Look for an option related to chassis intrusion or security and disable it. If you prefer to keep this feature enabled, ensure it’s correctly configured according to your motherboard’s manual.
- Save Changes and Exit: Save your changes and exit the BIOS/UEFI. The system will restart, and the error should be resolved if it was related to a configuration issue.
Update BIOS/UEFI Firmware
Outdated firmware can sometimes cause compatibility issues or malfunctions:
- Check for Updates: Visit the motherboard manufacturer’s website to find any available BIOS/UEFI updates.
- Follow Update Instructions: Carefully follow the manufacturer’s instructions for updating the BIOS/UEFI firmware. This process varies between different motherboards and requires caution to avoid damaging the motherboard.
Consult a Professional
If the above methods do not resolve the issue, it may indicate a more serious problem with the motherboard. In such cases, consulting with a professional technician or considering a motherboard replacement may be necessary.
Preventive Measures and Considerations
Regular Maintenance Checks: Regularly inspecting the internal components of your computer not only helps in ensuring everything is in working order but also allows you to check the status of the chassis intrusion sensor. Ensure it’s free from dust and properly seated in its designated spot.
Familiarize with Your System’s BIOS/UEFI: Understanding the ins and outs of your system’s BIOS/UEFI settings can be incredibly beneficial. Familiarity allows you to confidently navigate and configure various settings, including those related to security and hardware monitoring, effectively reducing the risk of encountering errors.
Keep Documentation Handy: Keeping the motherboard manual or having access to online documentation can save time and frustration, especially when troubleshooting hardware-related issues. These resources provide valuable information about the chassis intrusion feature, sensor locations, and BIOS/UEFI settings.
Advanced Troubleshooting Steps
Conduct a Hardware Audit: If you frequently encounter the chassis intrusion error, it might be worthwhile to conduct a thorough hardware audit. Check all connections, inspect for any signs of wear or damage on the motherboard, and ensure all components are compatible and functioning correctly.
BIOS/UEFI Defaults: In some scenarios, restoring the BIOS/UEFI to its default settings can resolve the issue, especially if incorrect configurations are to blame. However, be mindful of the changes, as resetting to defaults might affect other custom settings.
Consider Hardware Upgrades: If your system is older, the chassis intrusion feature might be more of a nuisance than a benefit, particularly if it’s prone to false triggering due to outdated sensors or firmware. In such cases, considering a hardware upgrade might be more cost-effective and beneficial for overall performance and security.
Engage with Community Forums
Seek Peer Advice: Online tech forums and communities are valuable resources where you can seek advice or share experiences related to specific errors. Engaging with these platforms can provide insights into how others have resolved similar issues.
Documentation and Record-Keeping
Maintain a Log: Keeping a log of any changes made to your system, including BIOS/UEFI settings adjustments, hardware modifications, or firmware updates, can help in diagnosing issues more efficiently. A detailed record can also be invaluable to technicians if professional help is needed.
Conclusion
The “Chassis Intruded, System Has Halted” error is a protective measure designed to safeguard your computer’s integrity. While it can be frustrating to encounter, understanding the causes and knowing how to address them can help you quickly restore your system’s functionality.
Regular maintenance, cautious BIOS/UEFI configuration, and keeping your system’s firmware up to date are key practices in preventing this and other system errors, ensuring a smooth computing experience on Windows 10/11.