Isn’t it annoying when we try to queue for an official MM match, and suddenly we get a bitter surprise that VAC was unable to verify the game session? Now, for the people who are completely new to this area would feel like secluded from the topic. So, to start with what Vac is: Its nothing but Valve Anti Cheat system.
Its main job is detecting installation files anomalies where files might be manipulated to provide unfair means for players to gain an edge over other people. Talking more about this topic, Vac bans are permanent, non-negotiable and cannot be removed by steam system.
Problems You Might Face When You Get VAC Was Unable to Verify Your Game Session Error
Now, there is a viral game “Counter Strike Global Offense” which is quite famous among people and this game to becomes the prey of this problem. Players have been encountering the VAC was unable to verify your game session error message.
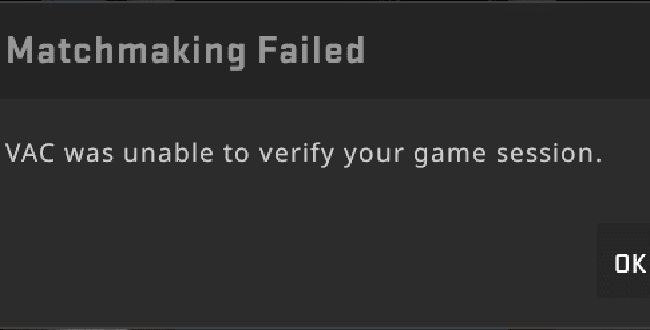
Essentially, players are seeing the error message appear and it forces them to stop playing CSGO. On occasion, it appears the error message can crash the game, too, forcing us to open Task Manager to close the game down.
The root cause of the issue appears to be tricky to track down, too. Some argue that aimbots cause it, not starting Steam as admin, or to do with new game updates.
There are a bunch of different theories. Of course, this means that it is tricky to pin down precisely what’s causing the VAC Was Unable to Verify the Game Session error. It means, too, that there are more than a few different fixes that have worked for different people.
Read Also:
- Steam Missing File Privileges
- Discord Screen Share Audio Not Working
- io.netty.channel.AbstractChannel$AnnotatedConnectException: Connection refused: no further information Error on Minecraft
What Causes VAC Was Unable to Verify Your Game Session Error?
There can be numerous reasons, one of which is system files damage. Corrupted system file entries can be a real threat to the well being of our computer. System file errors can occur in many ways. Incomplete installation or uninstall, improper deletion of applications or hardware.
It can also be caused if your computer is recovered from a virus or adware/spyware attack or by an improper shutdown of the computer.
All the above actives may result in the deletion or corruption of the entries in the Windows system files. This corrupted system file will lead to the missing and incorrectly linked information and files needed for the proper working of the application.
How to Fix VAC was Unable to Verify the Game Session Error
Here are the view ways by which the VAC was unable to verify your game session could be fixed.
Solution 1 – Reinstall Steam and CSGO
To do this, first exit Steam and follow these steps:
Step 1 – Click the Start button on Windows.
Step 2 – Type cmd into search, right click on Command Prompt and Run as Administrator.
Step 3 – Type this into Command Prompt: C:\Program Files (x86) \Steam\bin\SteamService.exe /repair (obviously change this if Steam is installed on a different drive).
Step 4 – Press Enter.
Step 5 – Open Steam up again and see if it’s work.
Solution 2 – Restart Steam Client
Step 1 – Exit Steam.
Step 2 – Reopen Steam, choose to Go Offline.
Step 3 – Choose to Restart in Offline Mode.
Step 4 – Once it has reloaded you in, go back online.
Step 5 – Choose to Restart and Go Online.
Step 6 – Play CSGO.
Solution 3 – Running Steam as Administrator
The first and foremost thing which we should check is if Steam has administrator access on your computer. Steam requires full access in order to provide you with the optimal gaming experience.
It means changing system configuration files and having a lot of resources and memory at its disposal. Be default; Steam doesn’t have full administrator access.
Solution 4 – Verifying Integrity of Game Files and Repairing Library
Most of the games available in Steam are very huge files consisting of several GB’s. It is possible that during the download/update, some of the data may have been corrupted. Steam has a feature within the client itself where you can verify the integrity of game files quite easily.
This feature compares your downloaded game with that of the latest version present in the Steam servers. Once it is done crosschecking, it removes any unwanted files or updates them if needed. There are manifests present in each computer where a game is install.
Instead of checking the files one by one (which take hours), Steam compares the manifest present on your PC with the one in the servers. This way, the process takes place much more quickly and efficiently.
We can also try Repairing Steam Library Files. Steam Library is the place where all your games are present, and you can only access them through it. It is possible that your Steam library isn’t in the correct configuration.
There may also be a case where you have installed Steam on one drive, and your games are on another one. In that case, you have to repair both the libraries before relaunching your game.
Solution 5 – Power Cycling your Computer
If all the above methods don’t bear any fruit, we can try power cycling your system. Power cycling is an act of Turning Off a computer entirely off and then on again. Reasons for power cycling include having an electronic device reinitialize its set of configurations parameters or recover from an unresponsive state or module.
It is also used to reset all the network configurations as they are all lost when you turn the laptop entirely off. To power cycle, your laptop Shut It Down properly and remove all the wires from it. Next, remove the battery correctly and detach it. Press the Power button for 1 minute.
Now, wait for around 2-3 minutes before plugging the battery back in. The reason for taking out the battery is to make sure that all the capacitors are discharged correctly and all the current data stored in RAM is lost. After turning the laptop back on, check if the problem got solved.
In case of a PC, shut it down completely, disconnect all modules and take out the main power cable. Now after waiting for the required time, plug everything back in and check if this solved the VAC Was Unable to Verify the Game Session problem.
Read Also:
- Skyrim Failed to Initialize Renderer
- Discord Overlay Not Working
- Overwatch Lost Connection to Game Server
Conclusion
If none of the above fixes work for you, the last resort would be to reinstall Windows completely. But it is recommend that this step should be taken only if it is essential as reinstalling windows could be quite risky.