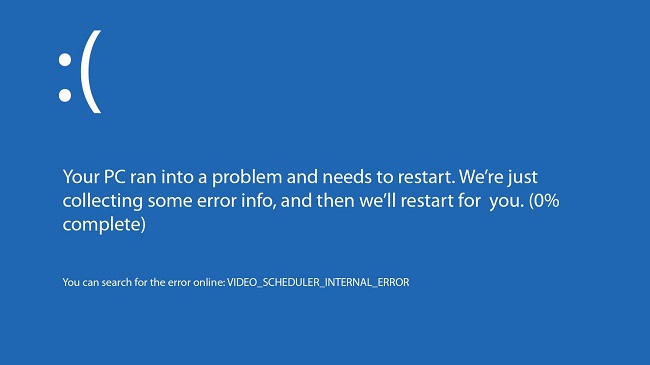
The Video Scheduler Internal Error is a Blue Screen of Death (BSOD) error that indicates that the video schedular has detected a fatal violation. This generally occurs during a computer restart or when you have recently installed new hardware or software which causes conflict between the video drivers and Windows.
At the point when you will see the video scheduler internal error, the PC will normally restart and before this error happens your PC will in all likelihood freeze for a few moments. The Showcase appears to crashes each now and then which is by all accounts baffling plenty of clients. So, first, we will learn about the causes through which this error has occurred.
Meaning of Video Scheduler Internal Error:
The “Video Scheduler Internal Error” is a Blue Screen of Death (BSOD) error on Windows 10 that is primarily related to issues with graphics drivers and hardware. When this error occurs, it signifies a problem with the Video Scheduler component of the operating system, which is responsible for managing and scheduling tasks related to graphics and video playback.
The error message appears when a critical error is detected in the video subsystem, leading to system instability. Users may experience sudden system crashes, leading to data loss and disruptions in tasks involving multimedia content, such as video playback, gaming, and graphic-intensive applications.
Read Also:
Causes of Video Scheduler Internal Error in Windows 10:
Several factors can contribute to the occurrence of the “Video Scheduler Internal Error” on Windows 10:
- Outdated or Corrupted Graphics Drivers: Incompatible, outdated, or corrupted graphics drivers are a common cause of this error.
- Hardware Issues: Problems with the graphics card (GPU), such as overheating, hardware damage, or poor connections, can trigger the error.
- Software Conflicts: Conflicts between graphics-related software, third-party applications, or recently installed programs can lead to this error.
- Windows Updates: Sometimes, updates to the Windows operating system can introduce compatibility issues with graphics drivers, causing the error.
- Overclocking: Overclocking the GPU or CPU beyond stable limits can result in system instability and this error.
- Viruses or Malware: Malicious software can affect system components, including graphics drivers, leading to errors.
- Corrupted System Files: Damage or corruption in system files related to graphics can cause this error.
6 Ways to Fix Video Scheduler Internal Error on Windows 10
There are various methods and solutions through which you can fix this kind of error which are mentioned below-
SOLUTION 1: Running a Full System Scan
There is some possibility that malware infections or viruses have caused the Video Scheduler Internal error to occur. These bugs may cause several issues related to the error. To determine if this is true, it is advisable to run a full system scan on your computer.
It can be done by using Windows Defender. Here are the steps:
Step 1: Go to the start menu and click the Search icon.
Step 2: Type “Windows Defender” (no quotes) on the search bar and open it.
Step 3: Now, Double-click Windows Defender Security Center to launch the antivirus.
Step 4: Once the Windows Defender Security Center will open, go to the menu on the left, then click Virus & Threat Protection or Shield Icon.
Step 5: Now, click the Advanced Scan link and on the Advanced Scans window, select the Full Scan option and Click Scan Now.
SOLUTION 2: Repair your Registry
The Video Scheduler internal error can also appear because of the corruption in the files. Follow the steps given below:
Step 1: Firstly, Press Windows Key + X to open the Quick Access Menu then select Command Prompt.
Step 2: Now, Right-click Command Prompt, then select Run as Administrator from the options.
Step 3: To proceed, click, Yes. Once Command Prompt is up, run this command sfc/scannow and press “Enter.”
Step 4: Wait for the scanning process to be done and then restart your computer to get your corrupted files repaired.
The process might take some time. Do not interfere. After the scan is over, check the error is fixed or not.
SOLUTION 3: Update Video Drivers
As mentioned above, Incompatible and Outdated Graphic Drives can cause the Video Scheduler Internal Error. Sometimes when you don’t update an outdated river for long, it could cause several issues. Update the graphic drivers to fix the error. Here are the steps to update the graphic drivers:
Step 1: Launch the Run dialogue box by pressing Windows Key+R on your keyboard.
Step 2: In the Run Windows, type “msc” (no quotes), then click OK to open Device Manager.
Step 3: Now, move to the Display Adapters category and expand its contents.
Step 4: Now, from the list right-click on the video card, then select Update Driver and follow the on-screen instructions to complete the procedure.
Step 5: After updating your graphics driver, restart your computer.
SOLUTION 4: Reinstall video card drivers
Also, there is another way to resolve the error by uninstalling the current video driver and installing the latest version from Windows.
Follow the instructions given below:
Step 1: First, click on the start menu at the down-left corner of the home screen.
Step 2: Then, Launch the Run dialogue box from Windows on your keyboard.
Step 3: Once the Run dialogue box is up, type “msc” (no quotes) and press OK.
Step 4: Move to Display Adapter Category to expand its contents and right-click on the video card.
Step 5: Click on the Uninstall Driver and restart your computer.
Step 6: After restarting the computer, Install the latest video card driver from the Windows Download Centre.
SOLUTION 5: Uninstall latest installed hardware or software
Furthermore, recently installed hardware or software may also trigger the Video Scheduler Internal Error. You can only do this by uninstalling the hardware or software which was recently installed on the computer.
Follow the steps below:
Step 1: Click the Search icon on your taskbar.
Step 2: Type “Apps & Features” (no quotations), then press the Enter key.
Step 3: Click the drop-down list in the program list window, then select Install Date.
Step 4: Now, look for the software you recently installed then click it.
Step 5: Select Uninstall to complete the application.
NOTE: If there is any recently added piece of hardware to your computer, try detaching it to resolve the problem. Restart your system, then check if the error is gone.
SOLUTION 6: Upgrade your Windows OS
This solution helps in improving the system’s stability and fix various issues and errors. As such, you need to upgrade your system patches to get rid of the problem. Here are the steps:
Step 1: Click on Start and open the setting app.
Step 2: Select Update and Security from the options.
Step 3: Check for updates and install the available updates.
Step 4: When the update is complete, restart your system.
Step 5: After adding the updates to your computer, check if the error has been fixed.
Read Also:
CONCLUSION
Video scheduler internal error is one of the most common error which mostly every user face once they have installed new hardware or software on their computer. All these solutions will help to fix the Video Scheduler Internal Error.
As mentioned earlier, this kind of error is quite common, so these methods could be handy to deal with them. It is advisable to try the solutions one by one and check after every attempt if it solved the error.