Can I Make a Collage in PowerPoint?
Absolutely! PowerPoint is not just for slides and bullet points; it’s a versatile tool that can easily be used to design photo collages. With features like smart guides, custom shapes, and picture formatting options, you can arrange photos creatively within your slides.
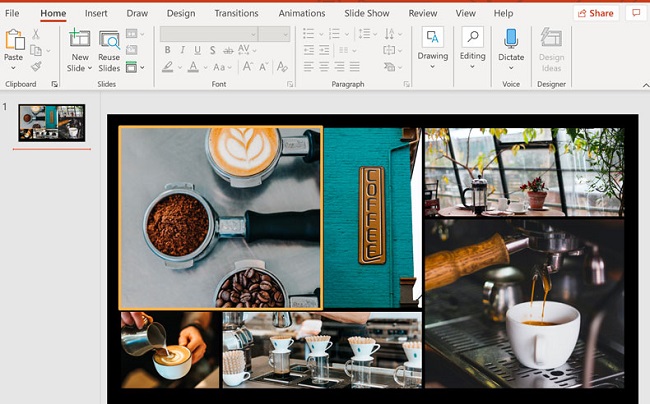
Creating or Inserting a Photo Collage in PowerPoint
Step 1: Gathering Your Images
Before you start, collect the images you want to include in your collage. Ensure they are saved in a compatible format (e.g., JPG, PNG) and are of good quality.
Step 2: Setting Up Your Slide
- Open PowerPoint and choose a blank slide for your collage.
- Background: Consider setting a background color or image by right-clicking on the slide and selecting “Format Background.”
Step 3: Inserting Images
- Go to the “Insert” tab, click “Pictures,” and select “This Device” to upload your images.
- Repeat the process to add all desired images to your slide.
Step 4: Arranging Your Collage
- Resize and Crop: Select an image, then drag the corners to resize. Use the “Crop” tool under the “Picture Format” tab to adjust the image dimensions.
- Layering: Right-click on an image to “Bring Forward” or “Send Backward,” creating depth in your collage.
- Alignment: Use PowerPoint’s alignment tools (under “Picture Format” > “Arrange”) to ensure even spacing and alignment.
Step 5: Adding Effects
Enhance your collage with artistic effects, borders, or shadows for a polished look. These options are found under the “Picture Format” tab.
Creating a Mosaic in PowerPoint
To create a mosaic effect, you’ll need to insert multiple small images to form a larger picture.
- Insert Small Images: Follow the steps above to insert and arrange smaller images closely together.
- Align Precisely: Use the “Align” tool for uniform spacing. Overlaying images slightly can help achieve the mosaic effect.
Making a Picture Grid in PowerPoint
For a structured collage, a picture grid is ideal:
- Insert Shapes: Use the “Insert” > “Shapes” to create equal-sized rectangles or squares across the slide.
- Fill Shapes with Images: Right-click on a shape, select “Format Shape,” then choose “Fill” > “Picture or texture fill” > “File” to insert an image into each shape.
Creating a Collage on Your Laptop with Microsoft Office
PowerPoint
Follow the steps outlined above to create your collage directly in PowerPoint, leveraging its various design tools for a customized layout.
Word
- Insert Images: In a blank document, insert your images via the “Insert” tab.
- Text Wrapping: Right-click on an image, select “Wrap Text,” and choose “Tight” or “Behind Text” for easier movement and overlap.
- Arrange Your Collage: Resize, rotate, and arrange your images as desired.
Elevating Your Presentation with Advanced Collage Techniques in PowerPoint
Taking your photo collage creation in PowerPoint to the next level involves exploring more advanced techniques and features that the software offers.
By delving into custom animations, utilizing smart art, and integrating multimedia elements, your collage can transform into an interactive and captivating presentation element. Here’s how you can further refine and enhance your photo collage within PowerPoint.
Integrating SmartArt for Dynamic Layouts
- SmartArt Selection: For a quick and stylish arrangement of your images, navigate to the “Insert” tab and select “SmartArt.” Choose a layout that complements the theme of your collage. Picture-oriented SmartArt, like Picture Accent Process or Picture Grid, can be particularly effective.
- Customizing SmartArt: Once you’ve inserted your SmartArt, click on the picture icons within the SmartArt to add your images. You can customize the SmartArt design and format for a cohesive look that matches your overall presentation style.
Leveraging Animations for a Dynamic Collage
To make your photo collage more engaging, consider adding animations that bring each photo to life:
- Selecting Animations: Click on an image and navigate to the “Animations” tab. Choose from a variety of entrance, emphasis, or exit animations to apply to individual images.
- Animation Pane: Use the Animation Pane (accessible from the “Animations” tab) to sequence and time your animations precisely. This allows for a smooth and coordinated presentation of your collage elements.
Adding Multimedia Elements
- Incorporating Video: Enhance your collage with video clips by going to “Insert” > “Video.” You can select a video stored on your device or online. Resize and position the video within your collage layout as desired.
- Background Music: To add a soundtrack to your collage, go to “Insert” > “Audio” and select “Audio on My PC.” Choose a music file to accompany your collage. Use the “Playback” options to control how and when the music plays during your presentation.
Creating a Collage with Hyperlinks
Adding interactivity to your collage can provide viewers with additional context or resources:
- Insert Hyperlinks: Right-click on an image within your collage and select “Hyperlink.” You can link to external websites, other slides within your presentation, or files, turning your collage into an interactive experience.
Customizing Slide Backgrounds
For a truly unique collage, consider customizing your slide backgrounds:
- Slide Background: Right-click on the slide background and choose “Format Background.” You can select a solid color, gradient, picture, or texture fill to complement your collage design.
- Transparency and Effects: Experiment with transparency settings and artistic effects to create a visually stunning backdrop for your collage elements.
Tips for a Professional-Looking Collage
- Consistency is Key: Maintain a consistent style throughout your collage, including font choices, color schemes, and image sizes.
- Less is More: Avoid overcrowding your collage. Giving each image some space can enhance visual impact.
- Quality Over Quantity: Use high-resolution images to ensure your collage looks sharp and professional.
Conclusion
Whether you’re using PowerPoint or Word, Microsoft Office provides a canvas for your creativity, enabling you to craft beautiful photo collages, mosaics, and picture grids. By combining images in a meaningful way, you can enhance the visual impact of your projects and presentations.
With practice, these tools can become an integral part of your storytelling arsenal, allowing you to convey messages in a more dynamic and engaging manner.
FAQ: Enhancing Presentations with Photo Collages in PowerPoint
1: Can I use PowerPoint to create a professional photo collage?
Absolutely! PowerPoint offers versatile tools for arranging images, customizing layouts, and adding design elements, making it an excellent choice for creating both professional and personal photo collages.
2: How can I make my photo collage in PowerPoint more engaging?
To make your collage more engaging, experiment with animations for individual images, incorporate multimedia elements like videos or background music, and consider using SmartArt for dynamic layouts. Additionally, interactive elements like hyperlinks can turn your collage into a more immersive experience.
3: What’s the best way to arrange photos in a PowerPoint collage?
The best arrangement depends on your presentation’s theme and purpose. Consider using grid layouts for a structured look, SmartArt for integrated designs, or freeform arrangements for a more artistic feel. Use PowerPoint’s alignment and distribution tools to ensure your collage is balanced and visually appealing.
4: How do I ensure my images are of high quality in the collage?
Use high-resolution images wherever possible to ensure your collage looks sharp and professional. Avoid stretching small images to prevent pixelation. If necessary, use image editing software to enhance image quality before adding them to your PowerPoint collage.
5: Can I add a video to my PowerPoint photo collage?
Yes, you can easily insert videos into your collage by going to the “Insert” tab and choosing “Video.” You can select a video file from your device or embed an online video. Resize and position the video within your collage layout as desired.
6: How do I add background music to my photo collage in PowerPoint?
Insert background music by navigating to “Insert” > “Audio” and selecting “Audio on My PC.” Choose a music file that complements your collage. Adjust playback settings, such as playing the music across all slides, to enhance the overall atmosphere of your presentation.
7: Is it possible to create an interactive photo collage in PowerPoint?
Creating an interactive collage is possible by adding hyperlinks to your images. Right-click an image and select “Hyperlink” to link to external websites, other slides in your presentation, or documents. This adds a layer of interactivity, allowing viewers to explore more content related to your collage.
8: How do I use SmartArt to create a photo collage in PowerPoint?
Select the “Insert” tab, click on “SmartArt,” and choose a layout suitable for photos, such as Picture Accent Process or Picture Grid. Click the picture icons within the SmartArt to add your images. Customize the SmartArt design and formatting to fit your collage’s theme.
9: Can animations enhance my PowerPoint photo collage?
Animations can significantly enhance your collage by adding movement and emphasis to specific images. Use the “Animations” tab to apply entrance, emphasis, or exit effects to your images. Use the Animation Pane to sequence and time your animations for a cohesive presentation.
10: What should I do if my collage makes the PowerPoint file too large?
If your PowerPoint file becomes too large due to high-resolution images, consider compressing the images within PowerPoint. Right-click an image, select “Compress Pictures,” and choose an appropriate resolution. This can reduce the file size without severely impacting image quality.
Mastering the art of creating photo collages in PowerPoint not only adds visual interest to your presentations but also enables more effective storytelling. By utilizing PowerPoint’s design tools and embracing creativity, you can produce captivating collages that resonate with your audience.